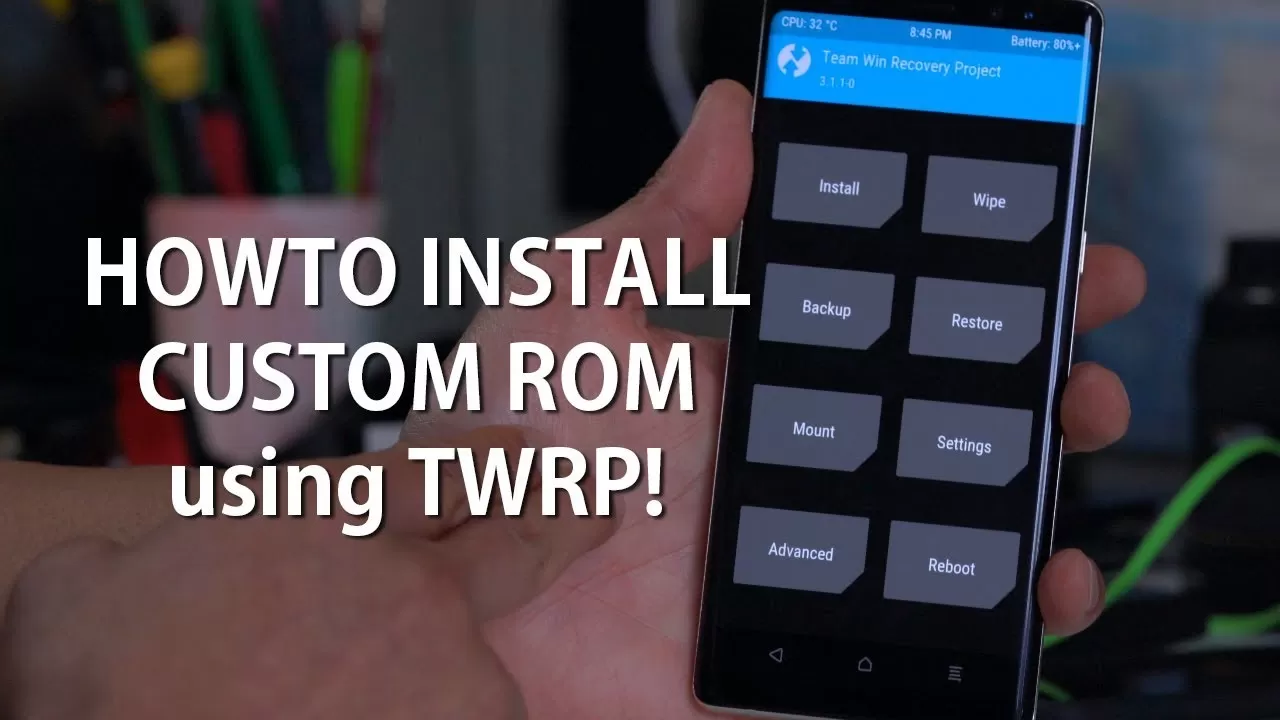
How to Flash a Custom ROM on Android (Universal Method)
How to Flash a Custom ROM on Android (Universal Method)
So you’ve been hearing about custom ROMs and finally decided to give your phone a fresh new life? Whether you’re tired of bloatware, want better performance, or just crave a cleaner Android experience — flashing a custom ROM might be the best decision you make for your device.
But hold up — don’t just dive in. You need to know what you’re doing, or you might soft-brick your phone. No worries though, I’ve got you. Here's a step-by-step guide that works for almost any Android phone.
⚠️ Disclaimer:
This will erase your data. Do it at your own risk. I’m not responsible if you end up turning your phone into a fancy paperweight. Backup everything.
✅ What You’ll Need:
-
Unlocked bootloader
-
Custom recovery (TWRP, OrangeFox, etc.)
-
A compatible custom ROM (
.zipfile) -
Optional: GApps (if your ROM doesn’t come with Google apps)
-
A PC or your phone’s internal storage
-
USB cable
-
Patience
Step 1: Backup Your Data
Let me say it again — back up everything. Use Google Drive, or manually copy your files to a PC. If you're already rooted, you can also use apps like Swift Backup or Titanium Backup (for advanced users).
Step 2: Download the ROM & GApps
-
Go to a reliable source like:
-
Make sure the ROM is for your exact device model.
-
If the ROM is “vanilla” or “no-GApps”, download the right GApps package (e.g., NikGApps or MindTheGapps).
-
Copy both
.zipfiles to your phone’s internal storage or SD card.
Step 3: Boot into Recovery

Most devices follow this combo:
-
Power Volume Up → Custom Recovery Mode
(If that doesn’t work, search “your phone model recovery key combo”)
Or from ADB:
adb reboot recoveryStep 4: Wipe Old Data
Once you’re inside TWRP or OrangeFox:
-
Tap on Wipe
-
Choose Advanced Wipe
-
Select:
-
Dalvik / ART Cache
-
System
-
Data
-
Cache
-
-
Swipe to confirm.
⚠️ DO NOT wipe Internal Storage, or you’ll lose your ROM files if they’re saved there.
Step 5: Flash the ROM
-
Go back to the main screen.
-
Tap Install
-
Navigate to where you saved the custom ROM
.zip -
Tap the file and swipe to flash
-
Wait — it takes a few minutes.
Step 6: Flash GApps (If Needed)
If your ROM like crDroid doesn't include Google services:
-
Tap Install again
-
Select the GApps
.zip -
Swipe to flash
⚠️ Flash GApps immediately after ROM, before rebooting.
Step 7: First Boot
Now:
-
Go back to the main screen
-
Tap Reboot → System
Your phone might take 5–10 minutes to boot — that’s normal. It’s building cache and optimizing the ROM.
Step 8: Set Up & Enjoy
Once it boots, you’ll go through the setup process just like a new phone. Log into your Google account (if applicable), and start customizing your new Android experience.
Optional Steps:
-
Root using Magisk (flash
Magisk.zipvia recovery) -
Install a custom kernel
-
Use Debloater tools to clean stuff up
-
Enable OTA updates if your ROM supports it
Common Issues:
Stuck on boot logo?
-
Try flashing again with a clean wipe.
No GApps?
-
Flash GApps immediately after ROM. Like these https://opengapps.org/
Bootloop?
-
Your ROM or GApps might be incompatible. Double-check version (e.g., Android 11 GApps for Android 11 ROM).
This method works on 90% of devices with unlocked bootloaders and a working custom recovery. Let me know your device name if you want me to tailor the guide specifically for you (with links and TWRP recovery).


Comments (0)
No comments yet. Be the first to comment!
Leave a Comment